


The accessories on your automobile’s engine are driven by a single belt that wraps around the pulleys. Video lessons a serpentine strip. Older vehicles used multiple drive devices called V-belts. Starting in the particular late 1980s, any serpentine system started replacing the V-belts. Serpentine belts last longer, require less maintenance (securing), and reduce the drag on the engine. There are numerous drawbacks from serpentine belts, however.
The problem with a serpentine product is that when the harness does break, you lose all of your products, namely the water pump motor. With a V-belt system, every one of the belts help commute the water pump, to help you to usually at least lifeless down the road. If the courbe belt goes, you happen to be done until you customize the one.
This is where protective maintenance is your close friend. You need to know the signs of a poor serpentine belt and the way change one.
Noise C A new worn serpentine belt can start slipping. With the design of serpentine techniques, slippage should not take place with a good belt. Moving can cause the strip to break or appear, leaving you stranded. Not like a V-belt that is slippage, a squealing serpentine gear should usually get replaced. Belt dressing is for V-belts, not serpentines.
Cracks C All courbe belts have cheese running lengthwise. How many cheese the belt offers depends on the width of the belt. In the event the ribs are crumbled or sections are usually missing, it needs to be swapped out right away.
Fraying C All drive belts are similar to car tires in construction; they’ve got cords inside them to hold the belt alongside one another. As the belt has on down, the cables can start showing, specifically on the edges. If your belt starts to demonstrate the fabric cords, it’s replace it. Misalignment from bad bearings in your gadgets or pulleys can also cause frayed belts.
Peeling C Another issue is when sections of a belt start delaminating through the rest of the belt. This is whats called peeling. Just like hangnail, little pieces of the chiseled non-ribbed side can start for you to flake off. Replace at the same time.
Glazed C The edges of the belt should be the same shade as the rest of the harness. If the edges happen to be shiny, then you likely have an issue with a concerning one of the accessories or support pulleys. This demonstrates a misalignment inside the system that needs to be resolved. Glazing can also be the consequence of worn belt or even worn out tensioner, allowing any belt to slip.
Oily C In the event your belt is fried, then you have a drip from one of your item components. The belt should replaced, combined with leaky component.
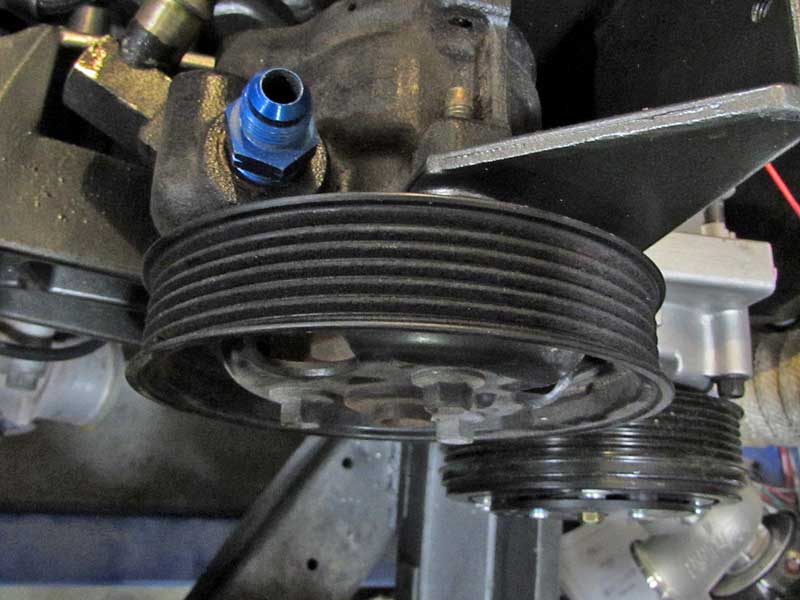
Serpentine gear pulleys are typically ribbed like this. This is the drive pulley for that power steering pump.
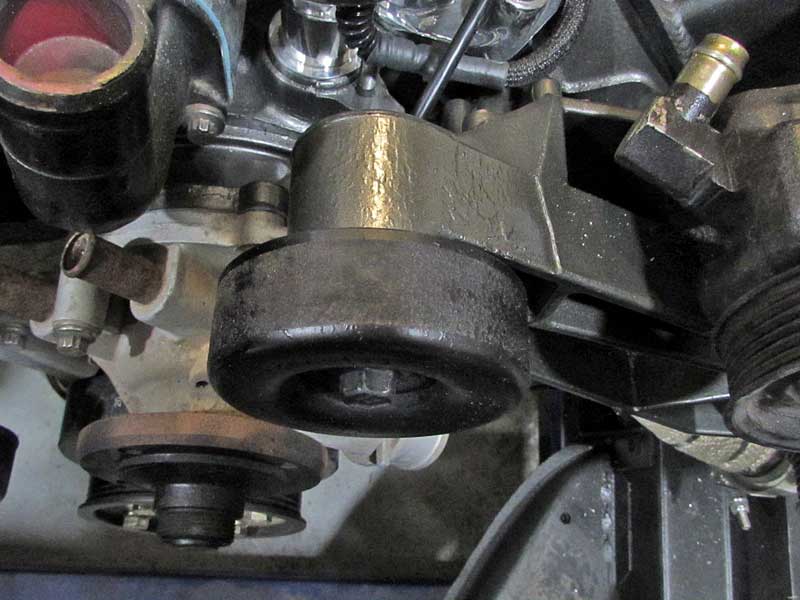
Idler pulleys (and some drive pulleys) are usually smooth, like this one upon Ford 302.
Replacing the strip is not tough, nevertheless, you need to know the direction-finding before you take it off. Nearly all vehicles have a decal under the hood while using the belt routing. When your sticker is neglecting or worn, create a picture or seek the internet. You must use the factory routing to ensure the belt in addition to accessories to work.
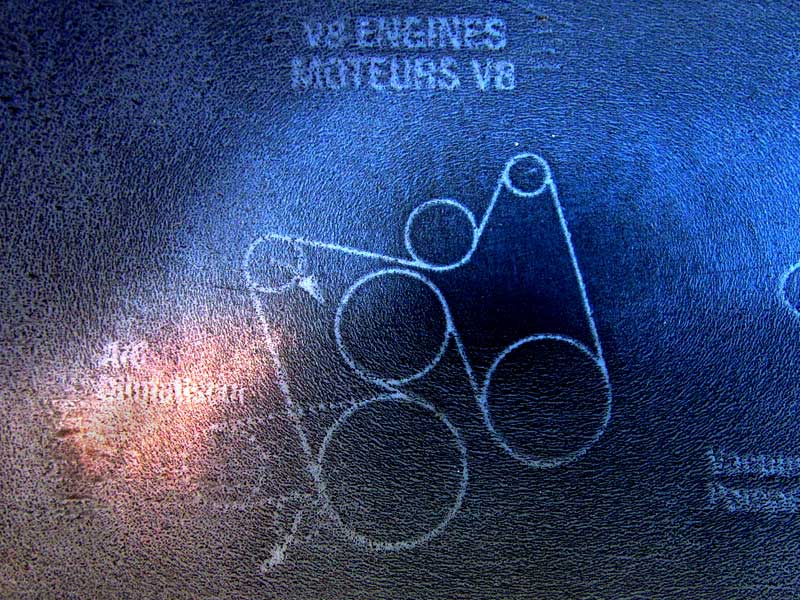
This can be a factory routing decal on a 2002 Chevy 2500HD truck.
All vehicles are wide and varied; you may need to remove some components to get to any belt. These may incorporate radiator, fan cloak, and braces. Some vehicles require removal of an engine mount. You’ll want to research your vehicle to understand the exact procedure.
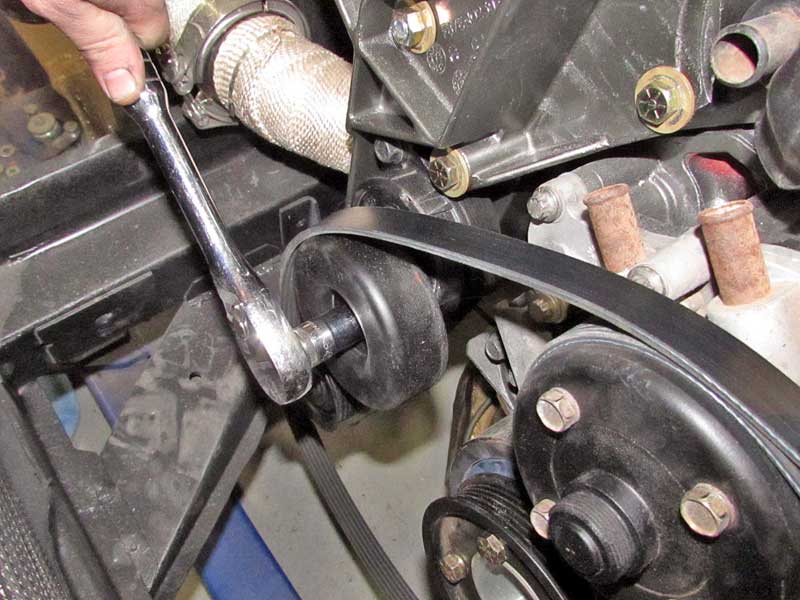
Once you will find the vehicle ready to your new belt, you need a wrench or ratchet with the correct socket to release a tensioner. Most vehicles uses spring loaded tensioner which adjusts itself to take care of proper tension to the belt at all times. This wrench is used to pull your tensioner away from the belt thus it can come off. Now you may release the tensioner.
Take the newest belt, make sure the cheese are on the inside, together with follow the routing. Abandon one pulley away.
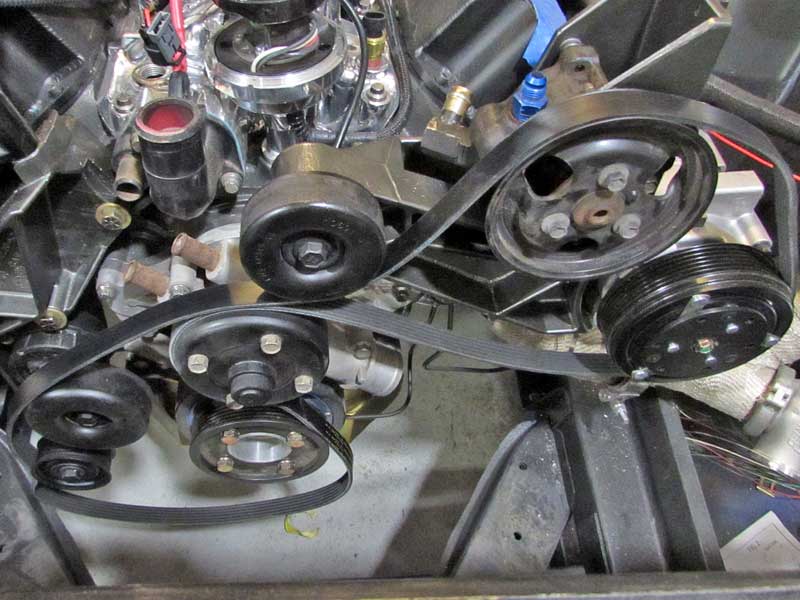
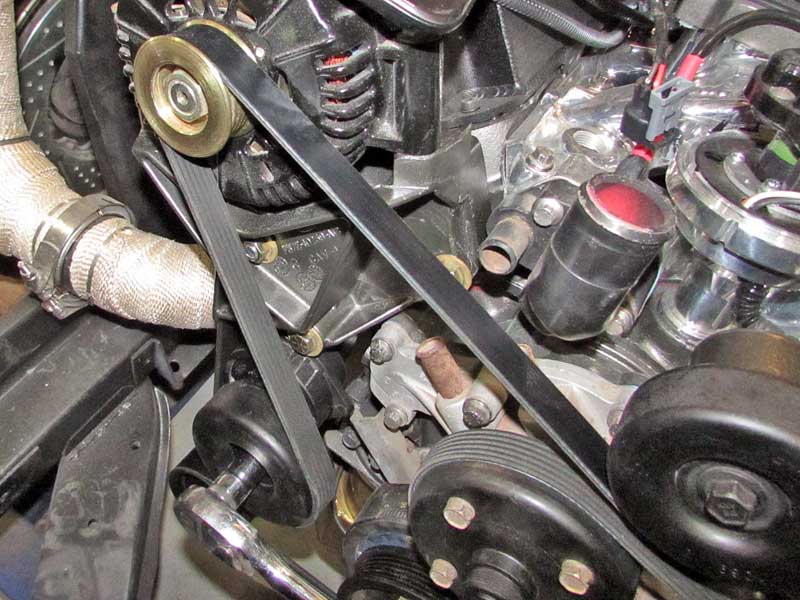
With the old belt away from, the new belt was initially loosely wrapped about the pulleys, leaving it off just one near the tensioner.
Using a ratchet in addition to socket (some tensioners will not require a socket, just the ratchet brain), release the tension along with hold in place.
Once just as before, use the wrench to remove the tension from the tensioner, and get the belt over the past pulley. It does not matter just what pulley you choose. Discharge the tensioner. At this point, this belt should be restricted and resting while in the grooves of every lever.
Now, slip the belt over the last pulley plus release the tensioner.
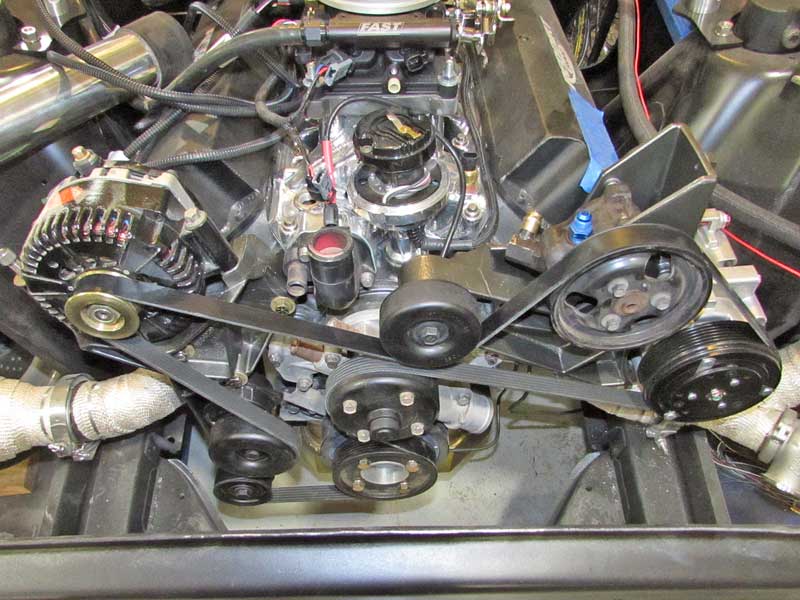
All finished, just like new. The regular change interval concerns every 100,One thousand miles for most cars or trucks.
This is a simple procedure for a lot of vehicles and you have the particular satisfaction of realizing you did it yourself.


